One of the most effective modes of practice to improve your drawing ability is to do a master copy drawing. A master copy is simply copying another drawing, or creating your own reproduction of an artwork by another artist. The ‘master’ concept comes from the idea that the most effective artists to copy are the best or master artists.
What I describe below is a low-pressure, controllable, and manageable process to do a master copy drawing. The point of doing a master copy is to push your skills into new territory. Doing master copies is a laboratory for exploring new techniques. The key word is ‘new’ which will also mean unfamiliar. The way to turn the unfamiliar into familiar is to take it slow. The process and procedure I describe below is easy to pick up and put down and work on over time, and for best results *should* be done in a low-pressure way and at a comfortable pace.
Master copies are usually prescribed and done in order to study specific master artists and their techniques. However, the process I describe below can be used to study and increase your facility with any type of drawing.
All representational drawing is a process of describing three-dimensional forms in two dimensions. Every artist must learn to do this in some way. What makes master artists masters, and good drawings good is often the economy of lines and the way the lines are used to create the illusion of form. By copying a master drawing, you are studying and learning the way the master did this, and this knowledge will be absorbed into your own vocabulary of form.
For example, if you are having trouble drawing hands, you can apply this method to doing copies of master drawings of hands. The same applies to feet, portraits and facial features, or any subject matter you’d like to be better at.
Tools
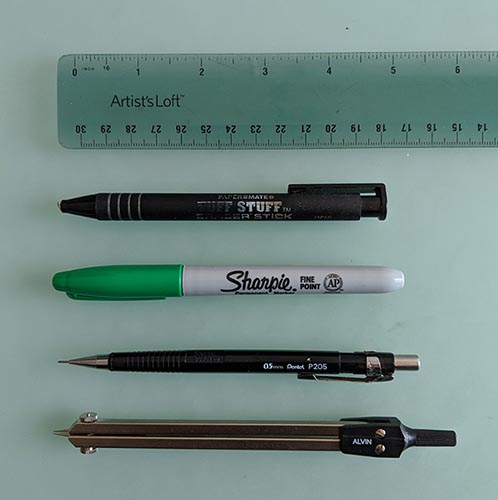
The tools I used for the drawing pictured below are:
- Ruler
- Eraser
- Sharpie Permanent Marker
- Mechanical Pencil
- Drafting Divider
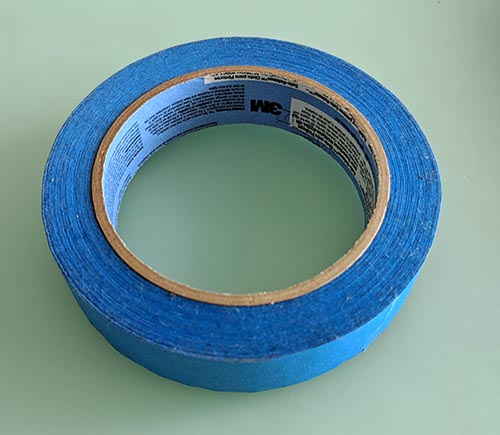
- 3M Safe-Release Painter's Tape, medium adhesion
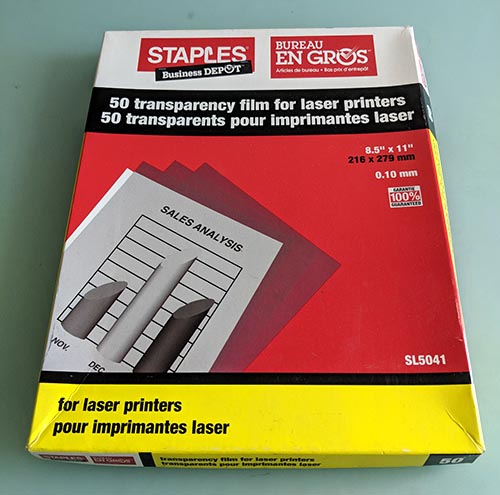
- Transparency film for laser printers.
- Paper or Sketchbook
- A Master drawing
You can use any tools you'd like. I'll describe the ones I prefer and tell you why.
Ruler: A decent and durable ruler is essential for setting up the drawing box and grid that I'll describe later
Eraser: I really love pen-style eraser sticks like these. They are inexpensive and great for precision erasing.
Sharpie Permanent Marker: We'll use a Sharpie marker to prepare the transparency that will serve as a guide and scaffold for our copy. I like any color other than black so it's easy to differentiate between the drawing and the your grid.
Mechanical Pencil: I prefer a mechanical pencil with a 2B lead. I like mechanical pencils for the consistency of line width and no need to sharpen. The drawing process I describe will not have a very broad range of values, so the range that a 2B pencil lead can create will suffice.
Drafting Divider: I believe a good drafting divider is one of the best and easiest to use tools for measuring in your drawings. This a great thing to own and can be used for master copies but also doing sight-size drawings, life drawing, or just about any drawing where you'd like to take measurements.
Painter's Tape: We'll use the painter's tape to secure the transparency to the drawing you are copying. The point of painter's tape is its low adhesion, so it should be safe to paper and remove without tearing or damaging the paper. Be sure to test this ahead of time.
Transparency Film for Laser Printers: This product is a relic from a fading technology. These are sheets of transparent plastic that you could feed into a laser printer and print text or graphics for use by a transparency projector. We won't be doing any laser printing on these. We'll use this to create a grid to place over the drawing you wish to copy. You'll be able to re-use this grid for any future master copy drawings you wish to do.
Paper: The drawing process I describe below will very likely take more than a few hours to complete. You'll very likely want to work on it in more than one sitting. For a multi-session drawing like this, I like to use a paper with a weight that can handle a lot of work. The drawings in this tutorial were done on the 9x12 size Canson Mix Media sketchbook Its 98lb. paper is just the right amount of thickness and weight for this exercise.
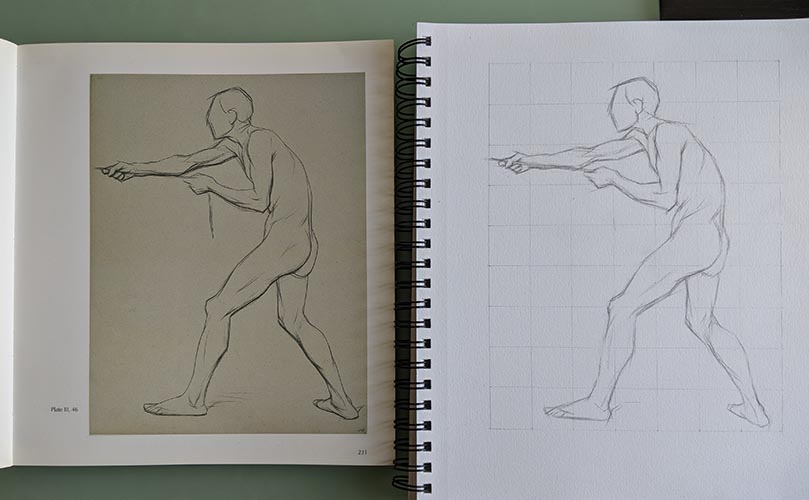
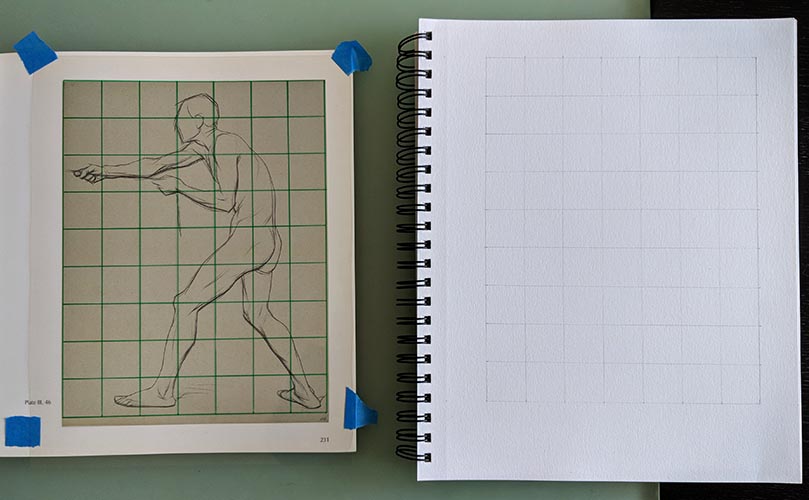
A Master Drawing: The master drawing in the pictures below are from my paperback copy of Charles Bargue: Drawing Course. This book is an excellent resource to own as it has many high-quality reproductions of drawings specifically meant to be copied. I'm using a drawing from this book as an example, but you can use this process on any drawing you think is worthy of copying.
Any task is easier and more fun with the right tools, so make sure you have them all and within easy reach.
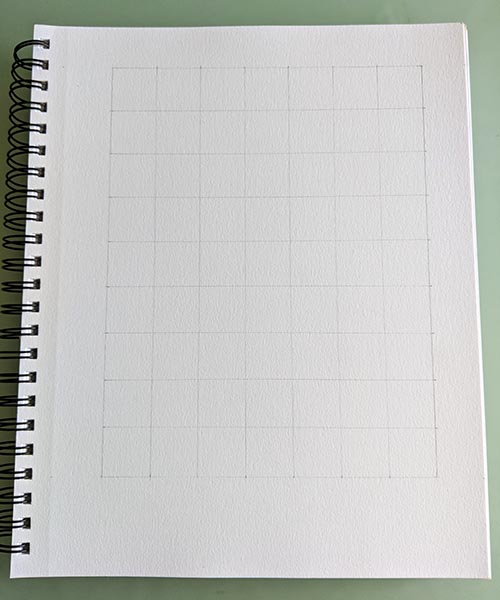
Step One: The Grid
The first task is to set up a grid for your drawing. Draw on your paper a 7-inch by 9-inch rectangular box. On each side of the box, place a mark at each inch-point on each side of the box. Then draw lines from each inch-point both horizontally and vertically to create a 7x9 grid of 1-inch squares.
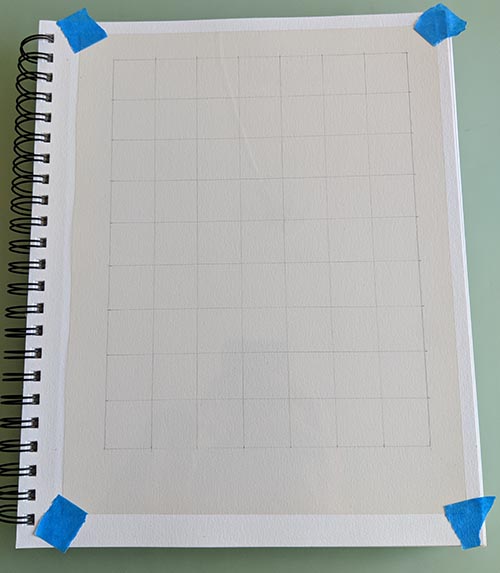
Step Two: Transparency Grid
Next, use the painter's tape to secure a single sheet of the transparency film over the grid you just created. Do your best to center the transparency over the grid as much as possible.
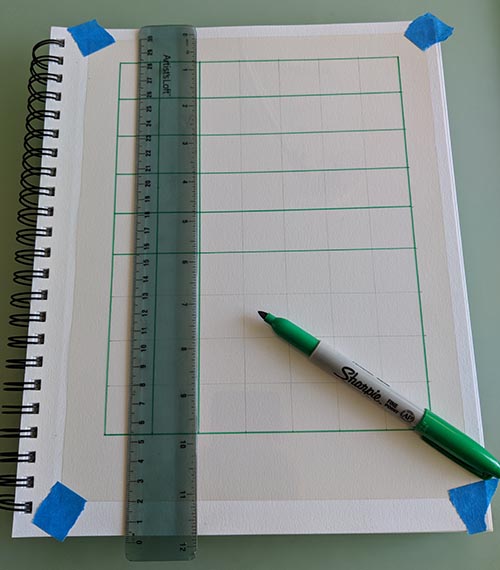
After you've done that, use the Sharpie and your ruler to trace the grid you've made on to the transparency. Take your time with this. Be aware that the ink from the Sharpie may remain wet for about 20 seconds and may smudge if you move the ruler before or touch the line before it dries. You can use a piece of paper towel to wipe the ink from the Sharpie off the side of the ruler.
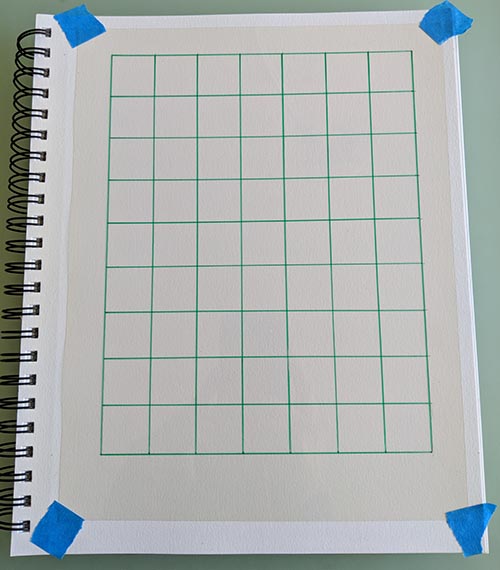
After you've traced the grid on the transparency, carefully remove the painter's tape. Place the transparency over your drawing and use the painter's tape to secure the transparency to the drawing you intend to copy. If you are careful and remove the tape slowly, you should be able to re-use your pieces of painter's tape to secure the transparency to the master drawing.
Step Three: Starting the Drawing
Once the grid is drawn on your paper and transparency, and your transparency is secured to your master drawing, it's time to begin your copy.
A key point, worth noting, is that the grid will help you create a copy of the master drawing that will be the exact size and dimensions of the master drawing.
To start, look at your examine your master drawing and look for the spots or points where lines in the drawing intersect with crossing grid lines on your transparency. The corresponding cross-points of grid lines on the grid you drew for your copy should be easy to find.
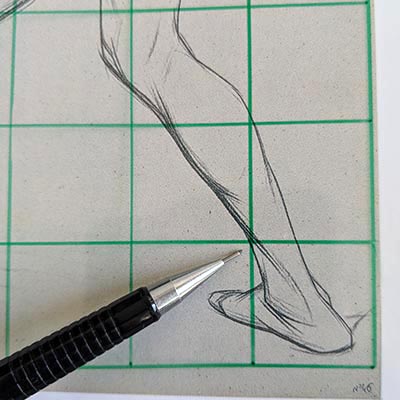
Place a light simple line over the cross-point to mimic the lines in the master drawing. Doing so will provide you with some starting marks to anchor the beginning of your copy.
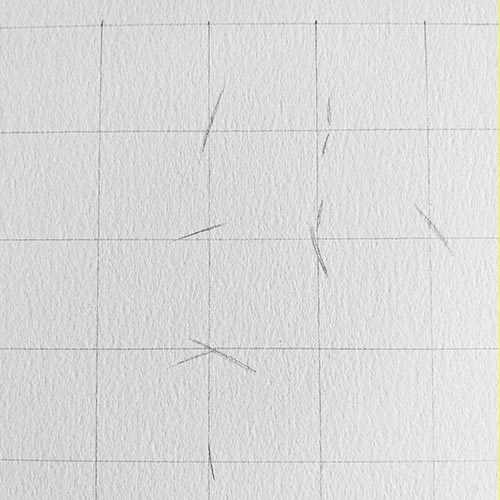
Once you've examined the master drawing for points where the drawing intersects with grid lines and made marks in the corresponding locations on your copy, you've got a base to build upon and a good start to your copy.
Next, continue to make simple line marks on your copy that correspond to lines on the master drawing and their intersection with the grid on your transparency.
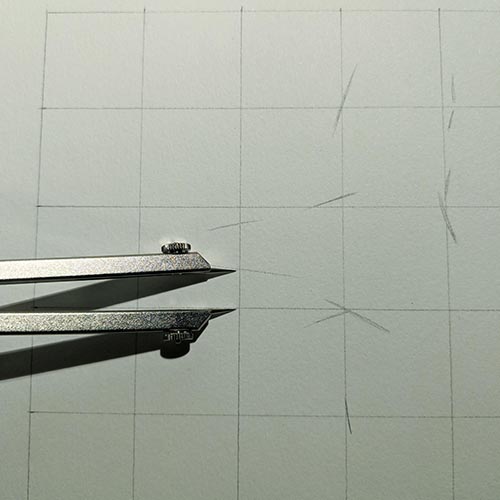
Use the drafting divider as an aid to measuring where to place drawing lines that intersect with grid lines.
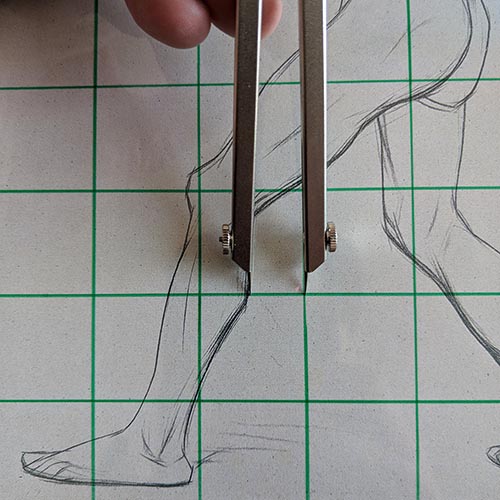
Step Four: Continue the Process & Take to Completion
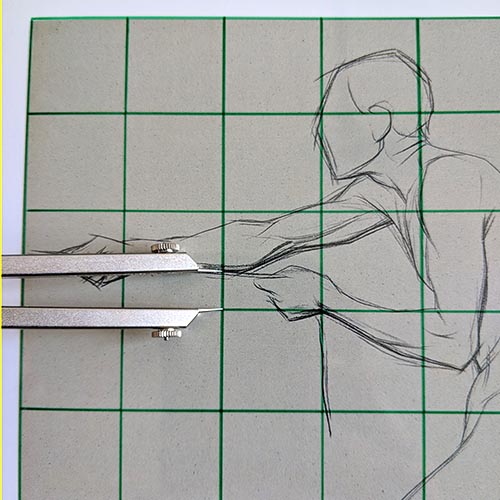
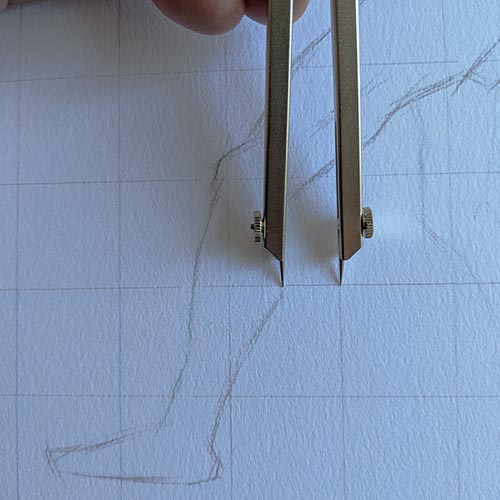
Once you get enough points and lines established on your copy, you can begin to connect the dots and lines. Your initial lines and measurements are a scaffolding that the rest of the copy can build on. The process for the rest of the drawing is the same for the start: find points and lines on the master drawing, and draw those lines in the same place on your copy. Use the calipers in any way you need to check the measurement and placement of your lines.
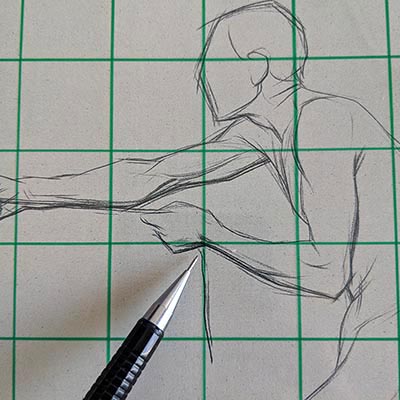
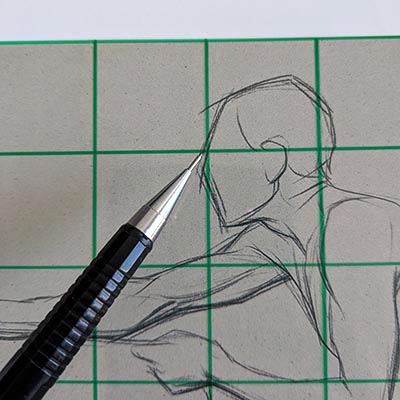
I recommend always working from big to small and from general to specific. In the case of the drawing and copy in these pictures, I started by focusing on getting a light and loose outline of the figure in place. At first, I did not worry too much about capturing all the nuance of line in the master drawing, but just some basic lines to give the figure a basic and accurate shape.
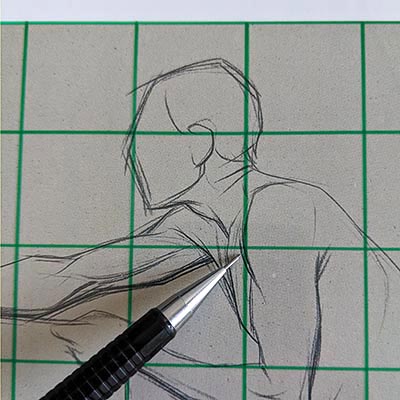
Once I had a basic outline and shape of the figure in place, I went in and began the process of adjusting (sometimes erasing and re-drawing lines) my copy to mimic the specific lines in the master drawing. I continued this process until, in an iterative manner, my copy approached higher and higher degrees of fidelity to the master drawing.

I hope you've enjoyed reading this tutorial on creating your own master copy drawing. Remember that this process and skill can be used to study and learn from any kind of drawing. This process can be used no matter how good your drawing skills are, to push them a bit further. You don't need to copy only other drawings, you can use this process to create a drawing of paintings or photographs. I have another tutorial on this site that describes a very similar process for breaking down and drawing a complex photograph of a landscape scene.
Also, remember that you can re-use your transparency grid. You only need to make it once, and then you can keep re-using it for additional master copy drawings.
You also don't always need to use a pencil to create your copy. Sometimes the benefit of doing a master copy is learning to use a new material such as charcoal, pastel, or colored pencil. There are great drawings to copy in this site's inspiration gallery in a variety of media.
I hope this tutorial has inspired you and shown you a path to better and more satisfying drawing.
UPDATE: See this post for how to make master copy drawings more challenging or more manageable.